
Using Azure DevOps to Deploy Hexo
One of the things that I wanted to be able to do was setup a full CI/CD pipeline for my blog. As someone once said If it’s worth doing, it’s worth overdoing and it was in that spirit I configured Azure DevOps to deploy Hexo.
First off a short intro to Azure DevOps. Previously known as Visual Studio Team Services (VSTS) it is a service that allows you to manage code repositories, boards, pipelines (which we’ll cover here) and even test plans. You can also use Azure Pipelines with GitHub and while I did not do that here because I wanted all my repos to be private, there is no reason you cannot use GitHub as your source repo. Especially since two weeks ago they announced free private repos.
This article will cover the following:
- Configuring your build in Azure Pipelines
- Install npm
- Install hexo-cli
- Generate the static site
- Publish the build artifacts
- Enable continuous integration
- Configuring your release in Azure Pipelines
- Select your source artifacts
- Enable AzureBlob file copy to copy content to $web
- Running your first build!
If you haven’t used Azure DevOps before there is an article covering how to get started.
Prerequisites
I will be assuming that a few things are already in place for the purposes of this guide.
- You’ll need to get Hexo configured locally and committed to a repo. I covered how to get Hexo running in the Windows Subsystem for Linux in a previous article.
- Your site committed to an Azure DevOps or GitHub repository.
- An Azure Storage Account provisioned and static website hosting enabled. This process would likely work for other services, but this article will explain how to do it with an azure account.
Setup your Build Pipeline
The first thing you will need to do is create a build definition. In Azure DevOps, click on Pipelines and then Builds. Then create a new build pipeline.
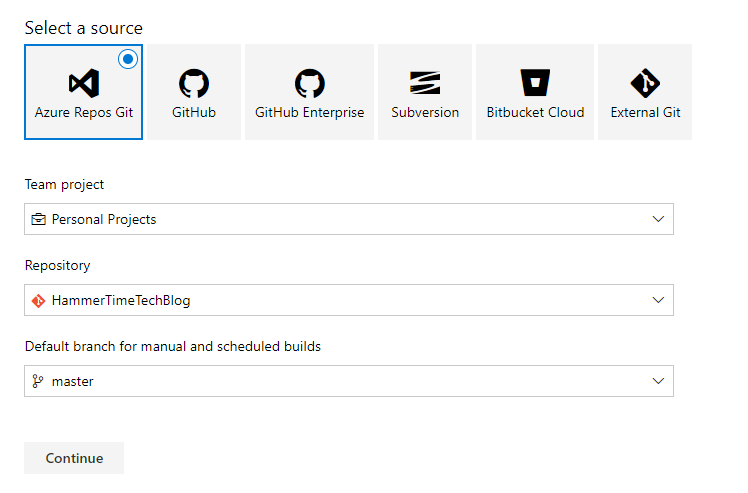
Select your source repository, we will be using Azure Repos Git:
 (
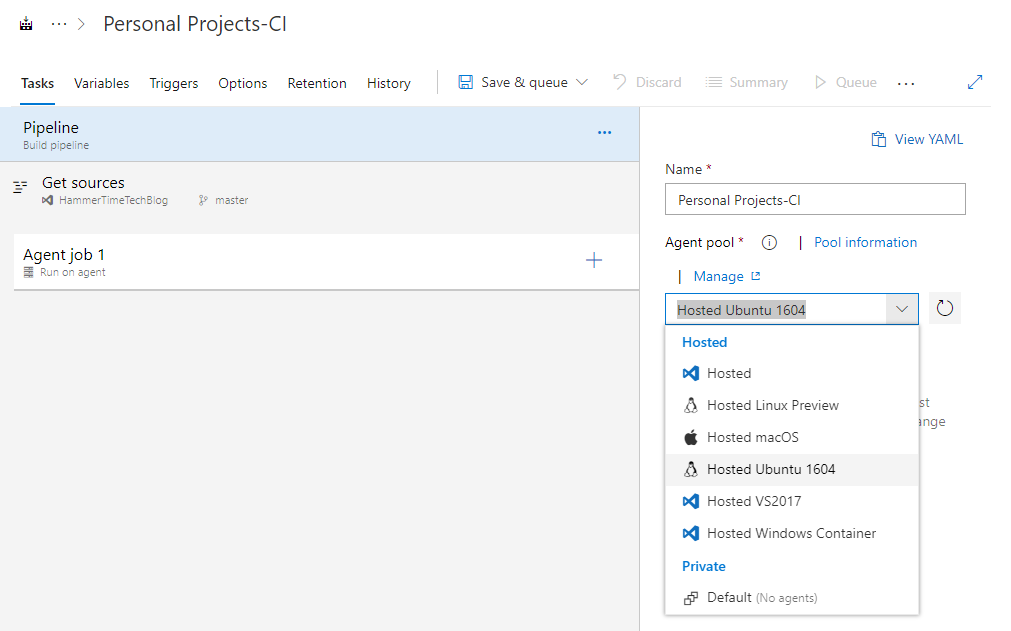
(After clicking continue start with an empty job. You’ll then be presented with your brand new build pipeline. On the right side you’ll need to pick Hosted Ubuntu 16.04
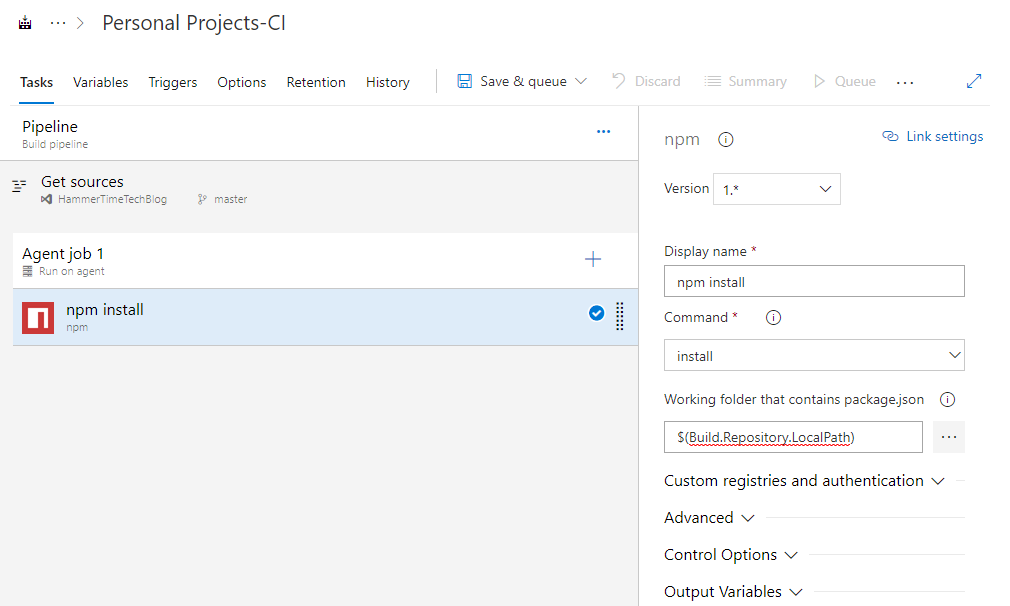
Under Agent Job 1 add a new step, search for and add npm
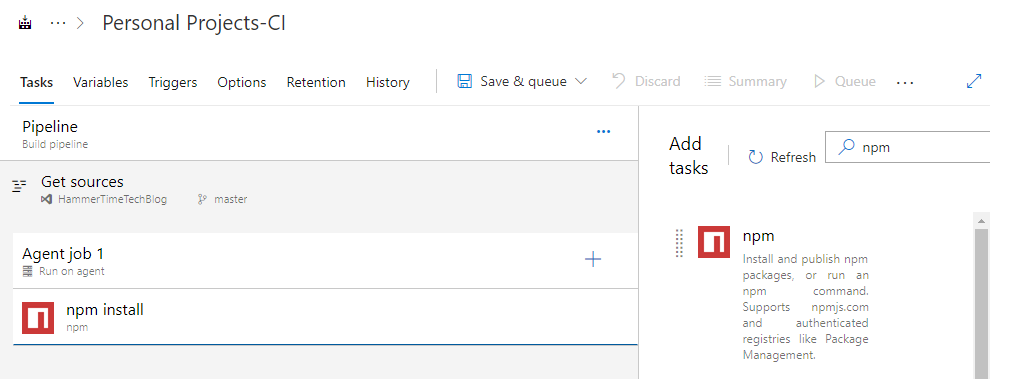
Select your npm install task and under “Working folder that contains package.json” add $(Build.Repository.LocalPath)
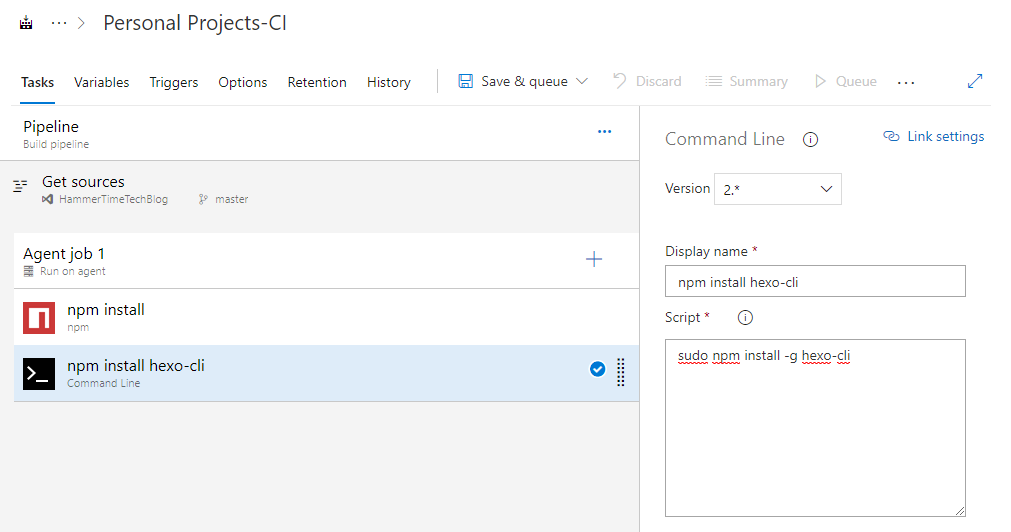
Under Agent Job 1 add a new step, search for and add Command Line. Under Display name add in Install Hexo CLI and then under script add sudo npm install -g hexo-cli
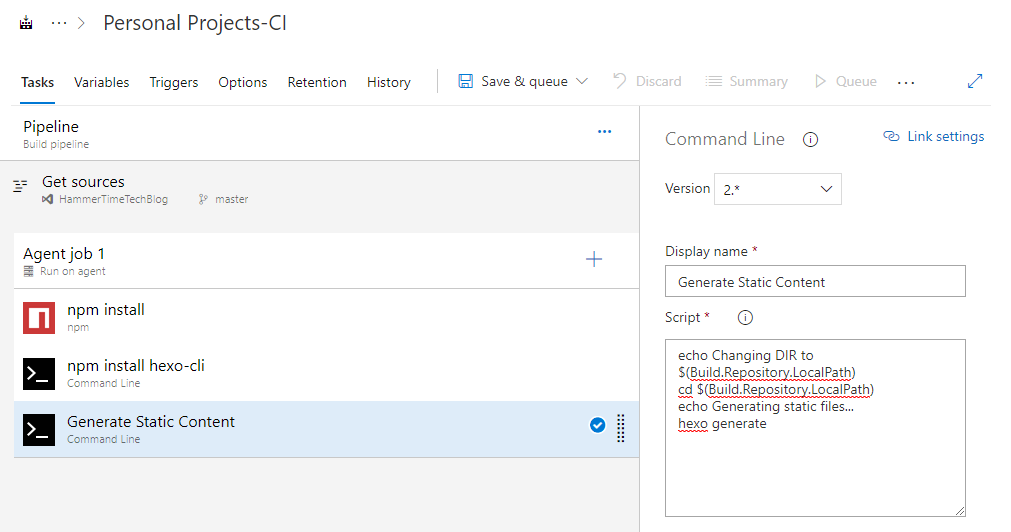
Add a second command line step. Under Display name call it Generate Static Content. The script content is as follows:
echo Changing DIR to $(Build.Repository.LocalPath)
cd $(Build.Repository.LocalPath)
echo Generating static files...
hexo generate
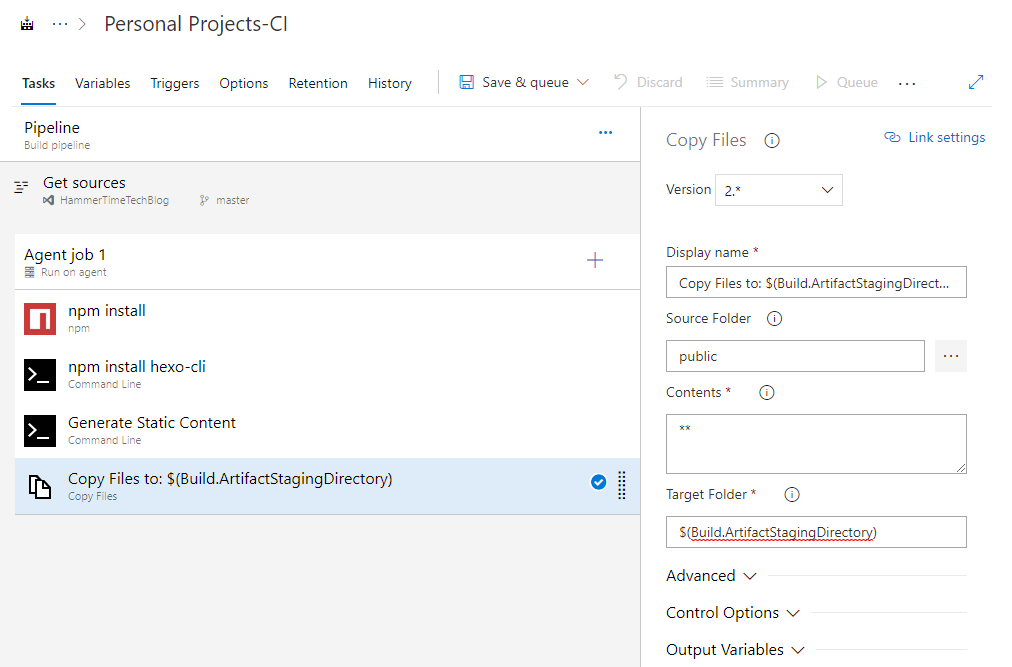
Next up you’ll need to copy the static content that was just generated into the build artifact staging directory. This will prepare the content to be published to the storage account.
To do this you’ll need to add a new step, search for and add Copy Files step.
Display Name: Copy Files to: $(Build.ArtifactStagingDirectory)
Source Folder: public
Target Folder: $(Build.ArtifactStagingDirectory)
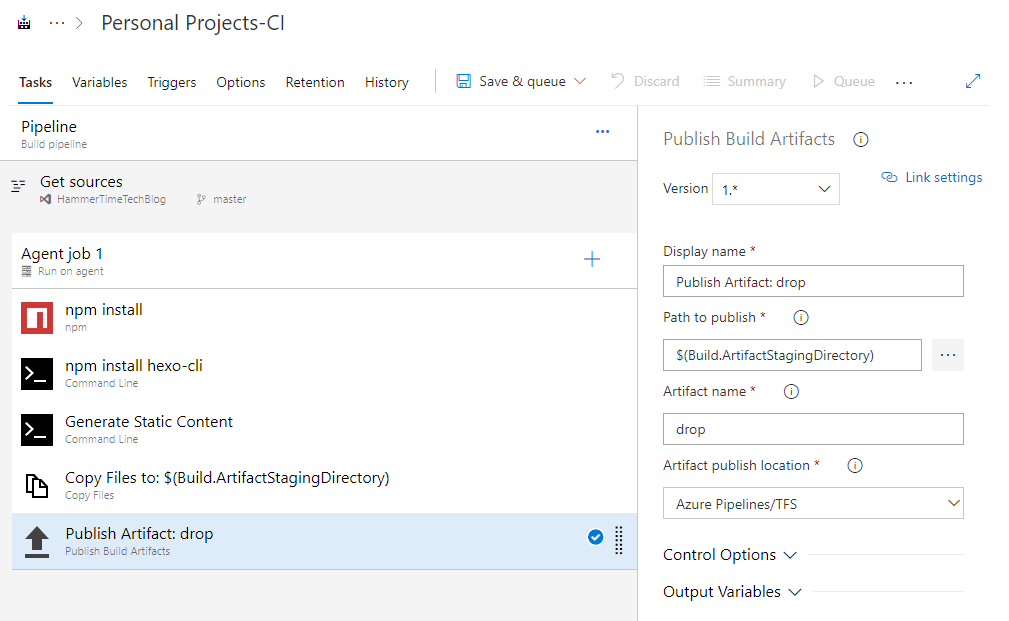
Last but certainly not least you’ll need to publish the artifacts for the release.
Add a new step, search for and add Publish Build Artifacts from the marketplace. For this step the defaults will be sufficient!
Now you’ll want to enable the continuous integration trigger. Enabling this means that when you commit code to the master branch the build will automatically trigger.
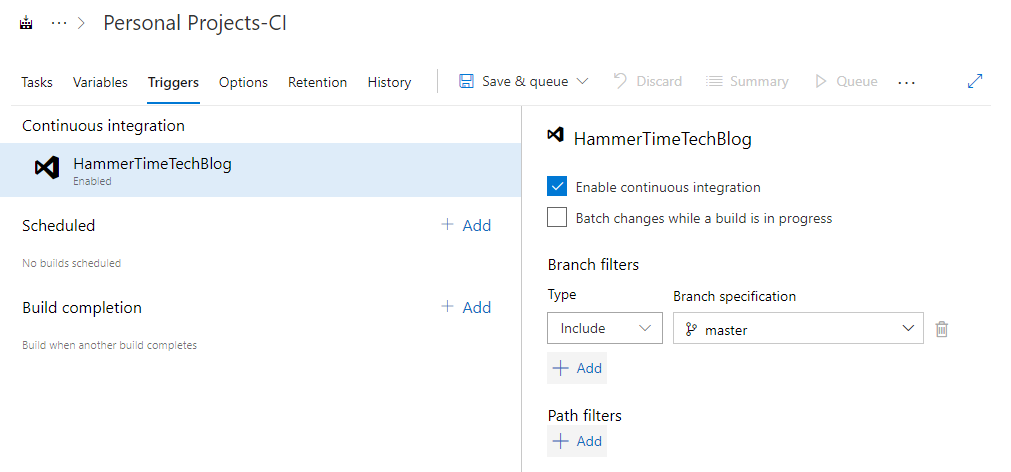
There are several other options here available so feel free to look around!
You’ve now completed your first build pipeline, but now you need to actually send the content somewhere.
Setup your Release Pipeline
Now that you’ve completed your build pipeline you will want to publish the static content out to your Azure Storage account.
Navigate to releases under Pipelines and create a new release. You’ll want to start with an empty job. Close out the dialog that appears for Stage 1, we will come back to that. You should now see the following:
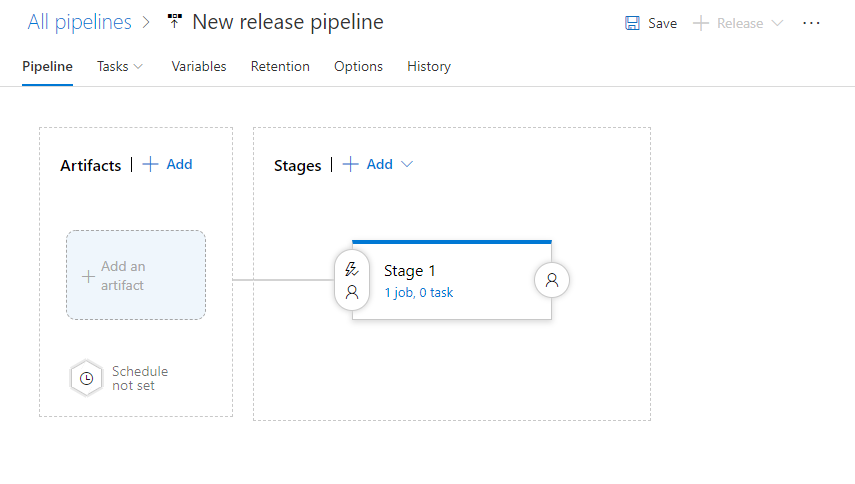
For this release to be successful you’re going to need some build artifacts. The good news is as long as we completed our build properly we should have some artifacts. Go ahead and click on Add an artifact.
On this page you’ll want to select Build, then under source select the build pipeline you completed earlier and click add.

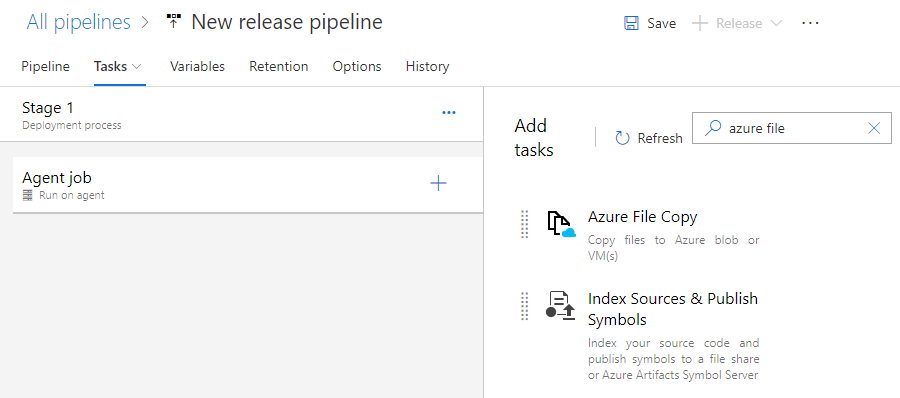
Now that you have a source let’s now add some steps to Stage 1. Do this by clicking where it says 1 job, 0 task. The screen will now look very similar to the build pipeline.
Here you’ll be adding at least one task which will deploy your site to Azure Storage. As mentioned earlier you need to have your Azure Storage account provisioned and static websites enabled.
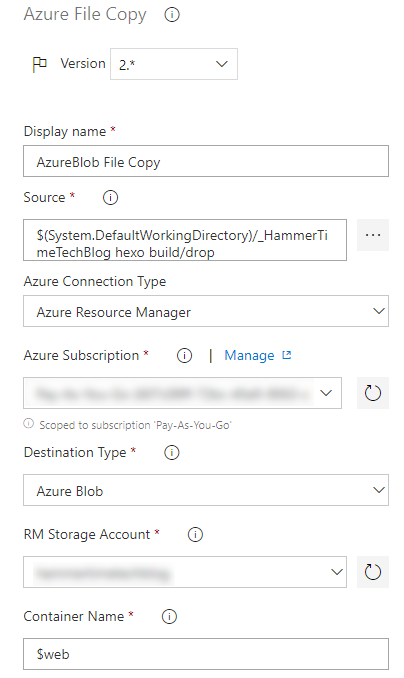
Go ahead and add a new task under Agent job, select Azure File Copy from the marketplace.
Now click Source and select the drop location, as long as you did everything right and have a successful build you should see something similar to the following. Select the drop folder as illustrated below.

Under Azure Subscription you’ll want to select the target subscription where your Azure Storage Account lives. If you do not see any listed you’ll need to set it up - you can find more detail on this here.
Fill out the remaining settings
Version: 2
Destination Type: Azure Blob
RM Storage Account: (select your storage account)
Container Name: $web
Head back over to the pipeline tab now and click on the lightning bolt next to your artifacts. Here, you’ll enable continuous integration. You don’t have to do this, but when you do it will automatically perform a release any time your build completes successfully.
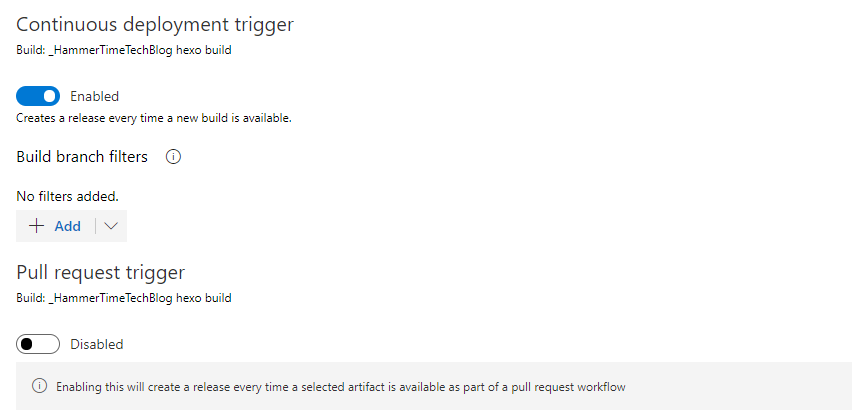
Go ahead and click save to finish out your release pipeline.
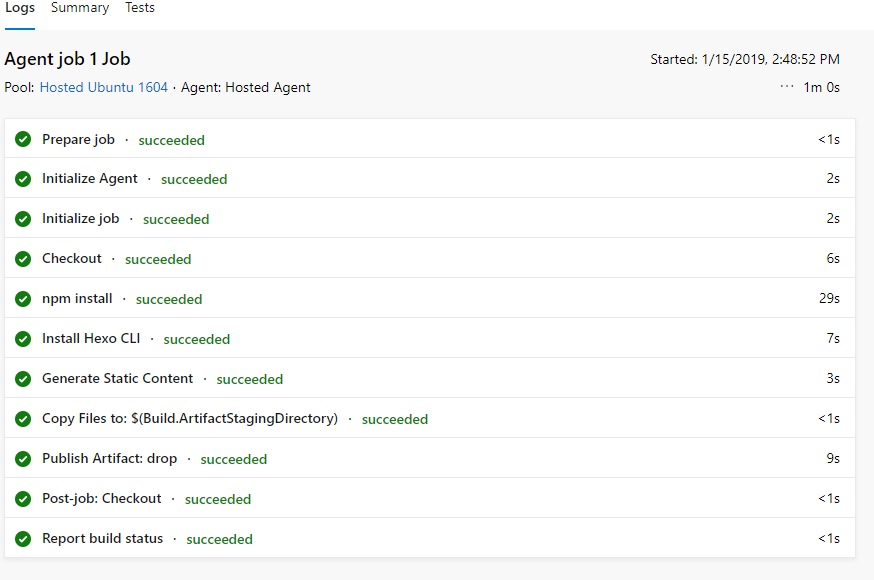
Watch it come together
Now when you complete a commit to your master branch it will automatically trigger your build and then your release. Here is an example of what a successful build, and then release looks like.
Build
Release

In Conclusion
You have now created a fully functional CI/CD pipeline for your blog publishing. But in reality this is only the beginning because there are many additional things you could do here!
- Add Azure CDN in front of your static website
- Setup your release pipeline to purge CDN content after publish
- Send a Telegram or Slack message when builds and release complete
- Schedule releases, rather than triggering them on release
Those are just a few options! I hope this post was helpful and please provide feedback here, or on Twitter if you run into any issues! Until next time!